Language
 English
English
English
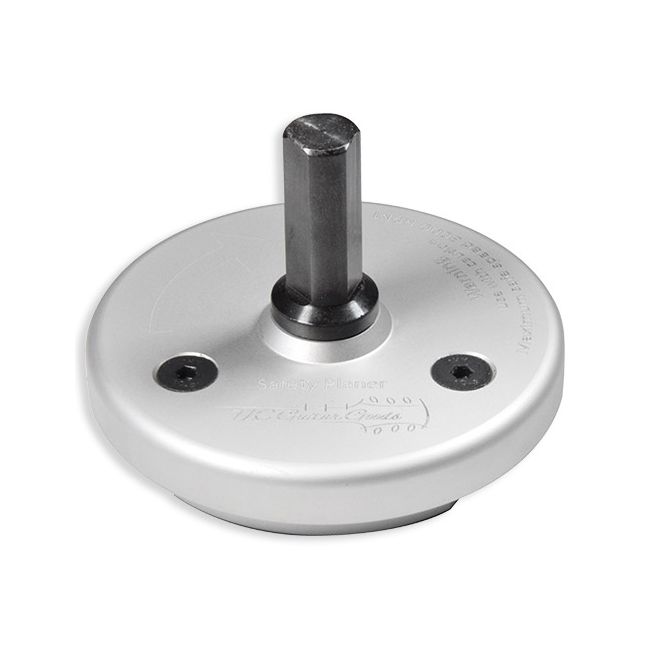
This is a great addition to your workshop for making wood to the right thickness. It takes less space than a thicknesser and is faster, safer and more consistent in use than a router. This tool can be used for your guitar headstock, fretboard, body, neck etc.
The Safety Planer is solely for use in your column drill and has a steel shank of 12,7mm (1/2”). You operate this at a speed of 2500 to max 3000RPM. The cutting area is 69,85mm (2-3/4”) and the cutting height 6.35mm (1/4”). We recommend smaller steps depending on the type of wood that you are using. For larger areas, you can step by step move your work piece and set the height of your column drill.
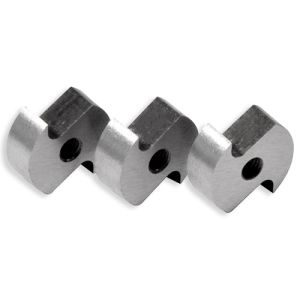
The thick aluminum casing holds 3 cutting blades. When one side of the blade has worn, you can easily switch it 180° and use the other side. We also have replacement blades available. The casing has a safety overlap of 5mm to the cutting area, but of course you will keep your fingers far from the blades – like with any other sharp tool!
Use:
Create a proper setup. For this you need the following:
- A planning table for your column drill;
- A guide fence;
- Recommended: A hold-down guide;
- Recommended: a featherboard.
Download HERE the work description on how to make these items yourself.
You will also need your vacuum cleaner to remove the sanding dust in order to prevent this from clogging. Clogging can cause the planer to get stuck or your workpiece to get uneven when dust comes between your workpiece and the table.
Check and set:
1. Check if your table is fully level with your drill. If possible, make a test round with a piece of scrap wood and check with your height meter.
2. Secure the Safety Planer in your column drill with the shank as far up as possible. Secure tightly at all points.
3. Set the rotation speed between 2500 and maximum 3000RPM. Never higher!
4. Set the height. Work in smaller steps depending on the wood you use towards the required thickness.
5. Place the wheel of your hold-down guide to the top of your workpiece.
6. Set your fence guide in place and secure it with a clamp. Your maximum cutting width is 69.85mm, but preferably work in smaller steps and move the guide fence with these steps in an overlap cut of 3 to 6mm.
Feeding the Safety Planer:
1. If your material is bumpy, determine which side wobbles the least on the table. Start with that side faced down and plane the top side smooth. Than flip the piece up-side-down and smooth the other side without adjusting the height.
2. Always feed your material to the planer in such direction that the rotation of the planer naturally moves the material towards the guide fence.
3. Use a featherboard to lightly press the material against the guide fence, without blocking it. Always keep your hands away from the blades!
4. When you are halfway along the width of your material, turn it 180° degrees horizontally and start from the other side till you planed the whole width.
5. The last pass is made with a minimum height adjustment for the smoothest result.
6. Don’t forget to switch on your vacuum cleaner!
Tips:
1. In order to square a neck blank, first plane the upside and downside. Turn your blank 90° and place your machinist square against the table and the blank. Lift the blank lengthwise on 1 side by adding (layers of) sticky tape on the bottom of the blank till it is square. Check the full length before feeding it through the planer.
2. The backside of your headstock can be planed after you’ve leveled the front side and cut the shape of your neck. Determine where the planer needs to stop before it hits your neck and make a stopper by clamping a block against the guide fence.
3. You can also remove a lot of material from your neck ensuring a block is in place to stop before you hit the heel.
4. If you want a compound neck, you can raise one side with (layers of) sticky tape. Where the sticky tape is added, the neck will be thinner.
Your Safety!
! Only operate this device with full attention and concentration.
! Keep your hands away from the blades.
! Wear safety glasses and a dust mask.
! Only work with sharp tools, replace the blades in time.
! Make sure the Safety Planer is mounted secure and the shank as far up as possible.
! Maximum speed is 3500RPM, never higher.
! Always use the guide fence, it prevents that your work is pulled from your hands.
! Use the vacuum cleaner, prevent sanding dust heaping up.
! Do not remove too much material in one pass, work in steps. Taking the time is saving time!
| Item | 129023 |
|---|---|
| Brand | TLC Guitar Goods |
| Size | 79,85x55mm |
| Type | Other |
| Material | Aluminum en steel |
| Weight | 300g |
| Sales unit | Pce |
At Guitar Goods we do our very best to make things as easy and fun as possible, for example:
 Nederlands